Remote Tools and & phpMyAdmin
To manage your database from the MODX Cloud dashboard, including being able to create, edit and export records, you need to use a remote database management tool or install phpMyAdmin.
Connecting Remote Database Tools
The most secure way to access and edit your database is to use a remote database tool such as Navicat for MySQL (commercial), MySQL Workbench (free) or Sequel Pro (free). Use the following directions to set up your remote database tool.
-
From the Clouds page of the MODX Cloud Dashboard, locate the Cloud you'd like to connect to.
-
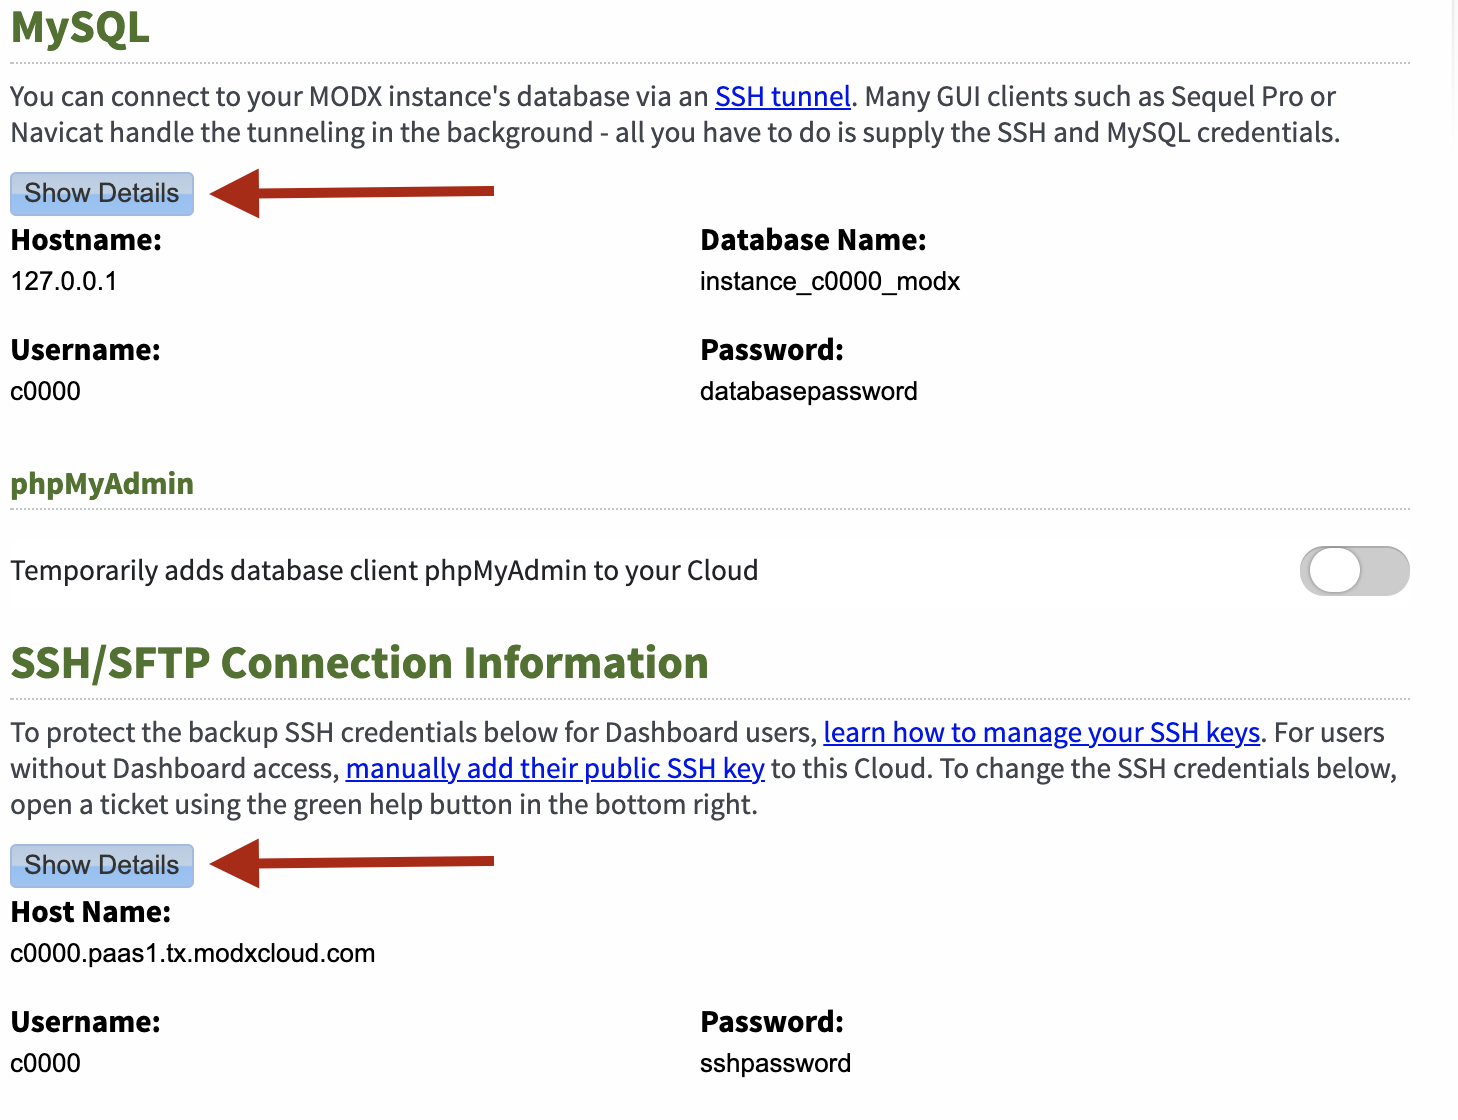
On the Cloud Edit Page, scroll down to the sections entitled "MySQL" and "SSH/SFTP Connection Information", near the bottom of the page, as indicated by the blue arrows on the image. You will use these credentials to set up your remote database management tool to access your Cloud database.
-
You can connect to your MODX instance's database via an SSH tunnel. Many GUI clients such as Sequel Pro or Navicat handle the tunneling in the background—all you have to do is supply the SSH and MySQL credentials you located in step 2.
Type or copy/paste the appropriate information into your preferred remote database management tool.
-
Should you wish to set up the tunnel manually, so that you can use your local mysql command-line client or another client that will connect on a local port, then you need to provide specific options during your SSH connection. If you're in Windows, look for documentation on configuring port forwarding in PuTTY. If you're in Linux or OSX, you can set up the tunnel from the command line as follows:
ssh -L <local_port>:127.0.0.1:3306 <ssh_username>@<ssh_hostname>
where local_port is the port on your machine that you will connect to, to tunnel to the database on MODX Cloud. This could be the default MySQL port of 3306, but if you already have a local MySQL server running, you may wish to use an alternate.
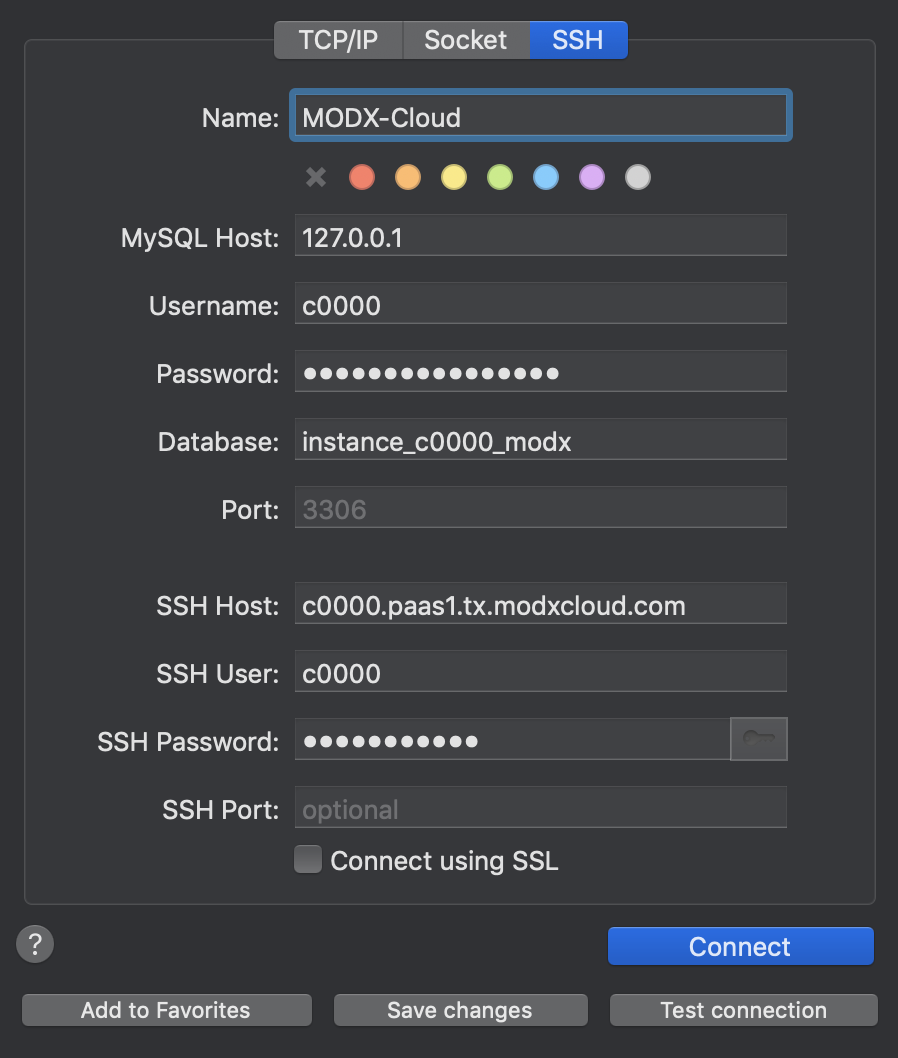
Example: Sequel Pro
In this example you can see how we used the MySQL and SSH/SFTP Connection Information, in the steps above in the Sequel Pro, setup: